Showing posts with label girlie. Show all posts

Friday, 13 July 2012

Blinged Up Cards!

As promised, here are two of the 'blinged up' cards I recently made.  I've had these die cuts for many moons now.  I got them before I had my own little pink Cuttlebug.  I added some little gems to them and put them onto a black and a white cardstock background.  The big silver diecuts were from Gill - thanks Gill!

Not sure which one looks the best, but they will both sell for the charities that I donate too.  The ribbon was a bargain - 20p for about 2 metres.  There were different colours so I picked out a couple.  Shame the shop has closed down now.  I miss that one - it always had loads of bargains, perhaps that's why it closed who knows.

More cards to follow, got a few done pre-DVT.  I'm hoping to be able to do some short crafting sessions soon so the blog will continue on!

Enjoy!

Sunday, 18 March 2012

For a Little Girl...

Another Snippets card, not in the official playground, but just one of many I make for cancer charities and donate to them.  It all helps as they say!
Again this is just snippets of card, a stamped image coloured with my gorgeous Promarkers and some glittered dots added as embellishments.
I try to keep them flatter now, due to the hgh postage charges.  Obviously hand delivered ones are made with more heightened (is there such a word?) embellishments.

Enjoy!

Monday, 12 March 2012

Chooks Birthday Card

I found this image in my 'stamped stash box' at the weekend and it was perfect for this stripy snippet I had in my 'snippets envelope'.  I do try to use all the bits of the tiniest paper as it's all given to cancer charitie for nothing.

This is ideal for a male or female birthday - well I think so anyway!  I think it's a Penny Black stamp but I'm not sure as it was a donated one.  I really must find out as I love it and will be putting them on my wish list.  I still have some Christmas/Birthday money to spend so will have to see.  My wish list is ever growing, I've just seen some of the new PB stamps and they are definitely on my wish list!

As this is one of my many charity cards, I was just wondering what you all do with the cards you make - obviously there are special ones for family and friends, but what do you do with the others? 

Enjoy!

Tuesday, 13 September 2011

Special Card for a Special Person!

 Here's the results of all the pink paper and card from WOYWW last week as promised.  I've had to keep it under wraps as it's for Di's birthday and I didn't want to blog it before it had arrived.  The lovely stamp was sent to me by Di, so I had to use it on this card as it was so cute!
 I've now figured out how to make stronger boxes with the Trimmer I have - who needs a proper board huh when you can make them like this.  I added a little pearl brad, backed with a spotty pink flower and then at the last minute added some BIG diamond gems to the front of the drawer.
 I've made easel cards before many many times, so decided to do something different with this one and made it on a slant.  I added some pretty little flowers I got in the Garden Centre at the weekend, sadly they came with no way of fixing them on the back, so I hope they stay stuck!  You can just see inside some of the little presents I put in there for the birthday girl...!
 There are several craft items which you can't see too well from this shot - I put some plain gold tissue paper through the Cuttlebug machine and it worked really well - ideal for presents as you can then personalise them however you want for the recipient.  I also added in some Ferrero Rocher, I somehow think they might be eaten whilst crafting - just don't blame me if you get chocolate on them!
 I used some of my bargain paper pad I got the other week on the front and sides of the box, I wish I'd got more than just one now, but hey ho, too late.
Here you can see a close up of the front cover of the card - I used my Promarkers to colour the "Just The Edge" pieces of card, I used two different colours and it changed it dramatically before my very eyes!  As it was being posted and is quite large (I had to do a made to measure version due to the chocolates!) I put some more gems on it, well it is pink and girly isn't it...!

You should've seen me in the shop lifting up all the chocolates to see how deep they were and if I thought they'd fit in the drawer - quite a sight I can tell you and I got some strange looks when I asked if the depth of the sweet could be guessed for me!  You never know what I'm going to do next.....

So watch this space......

Enjoy!

Monday, 22 August 2011

Making the Pink and Girlie Book Style Card - a Tutorial

Here's the basic card - sizes below for the actual book pages

I've tried making these cards with "quality cardstock" and they turned out too big for the cover.  Here I've used the cheapest cardstock from the Pound Shop and it works brilliantly - folds easily and takes the ink well too.  You need the following CS:

  • 2 pieces of 24cm x 12.5cm
  • 2 pieces of 24cm x 14.5cm
I found it easier to punch one side (I only have two punches, this one is "Daisy" by EK Success I believe) first.  This CS is easy to punch too which helps my poor old carpal tunnel riddled hands!

All the pieces folded here
 Dafydd helped with the folding here.  You need to score the CS every 2 cms. Nice and easy!

Bit difficult to fold with paws - but I did it - says Dafydd!
 You can see how it all folds together before it is glued.  I just use a white glue - similar to school glue we used to have!  Did anyone else love to put it on their palms and then wait for it to dry and pick it off on the way home?!?!?!?  Oops perhaps it was just me!

You can see the folding better here - it fits together well
Once folded at 2cm intervals, interleave them to make the book - quite easy once you get the first one together.  
All four sides stuck together - watch out for the glue if you have paws!
See, says Dafydd, it all folds together nicely. Had to have a caffeine free soda to help calm me down when glue stuck on my paws!  Eeeeeowwww!  After this you need to use ink to distress the sides and front of the box. I need to find something to do this properly as I only have one distress ink to try and didn't think how I was going to put it on!!

Here's my favourite "Cheeky Monkey" tin which holds my crafting tools
So who else spotted this little tin of mine?  It has a matching mug in it which I use when crafting.  It's great for holding my crafting equipment.  Here you need DST to put on the outside edges of the book card, ready for adding ribbon, makes it look smarter - you can also use self adhesive ribbon of course if you have that.

Here's the outside I was working on shown on a previous WOYWW
 I'd already made the outside cover, so here are the dimensions for you:

  • 15cm deep x 13.7cm (front cover), 2cm spine, 13.7cm back cover
When I have a printer again I'll scan in the image to make it clearer for you if needed (please let me know).  You can then either punch the edges, or add some 'half the page' already made edging.  I then colour them and add some Stickles.  Just love the bling!


My first distressing isn't that brilliant - I was more distressed I think!
 All you need to do then is add a backing paper to the box and stick it to the inside of the cover.  Voila - now you can embellish it with whatever you want. 

This glitter goes everywhere in the bed - I wake up with it in my eyebrows.....ahem...!
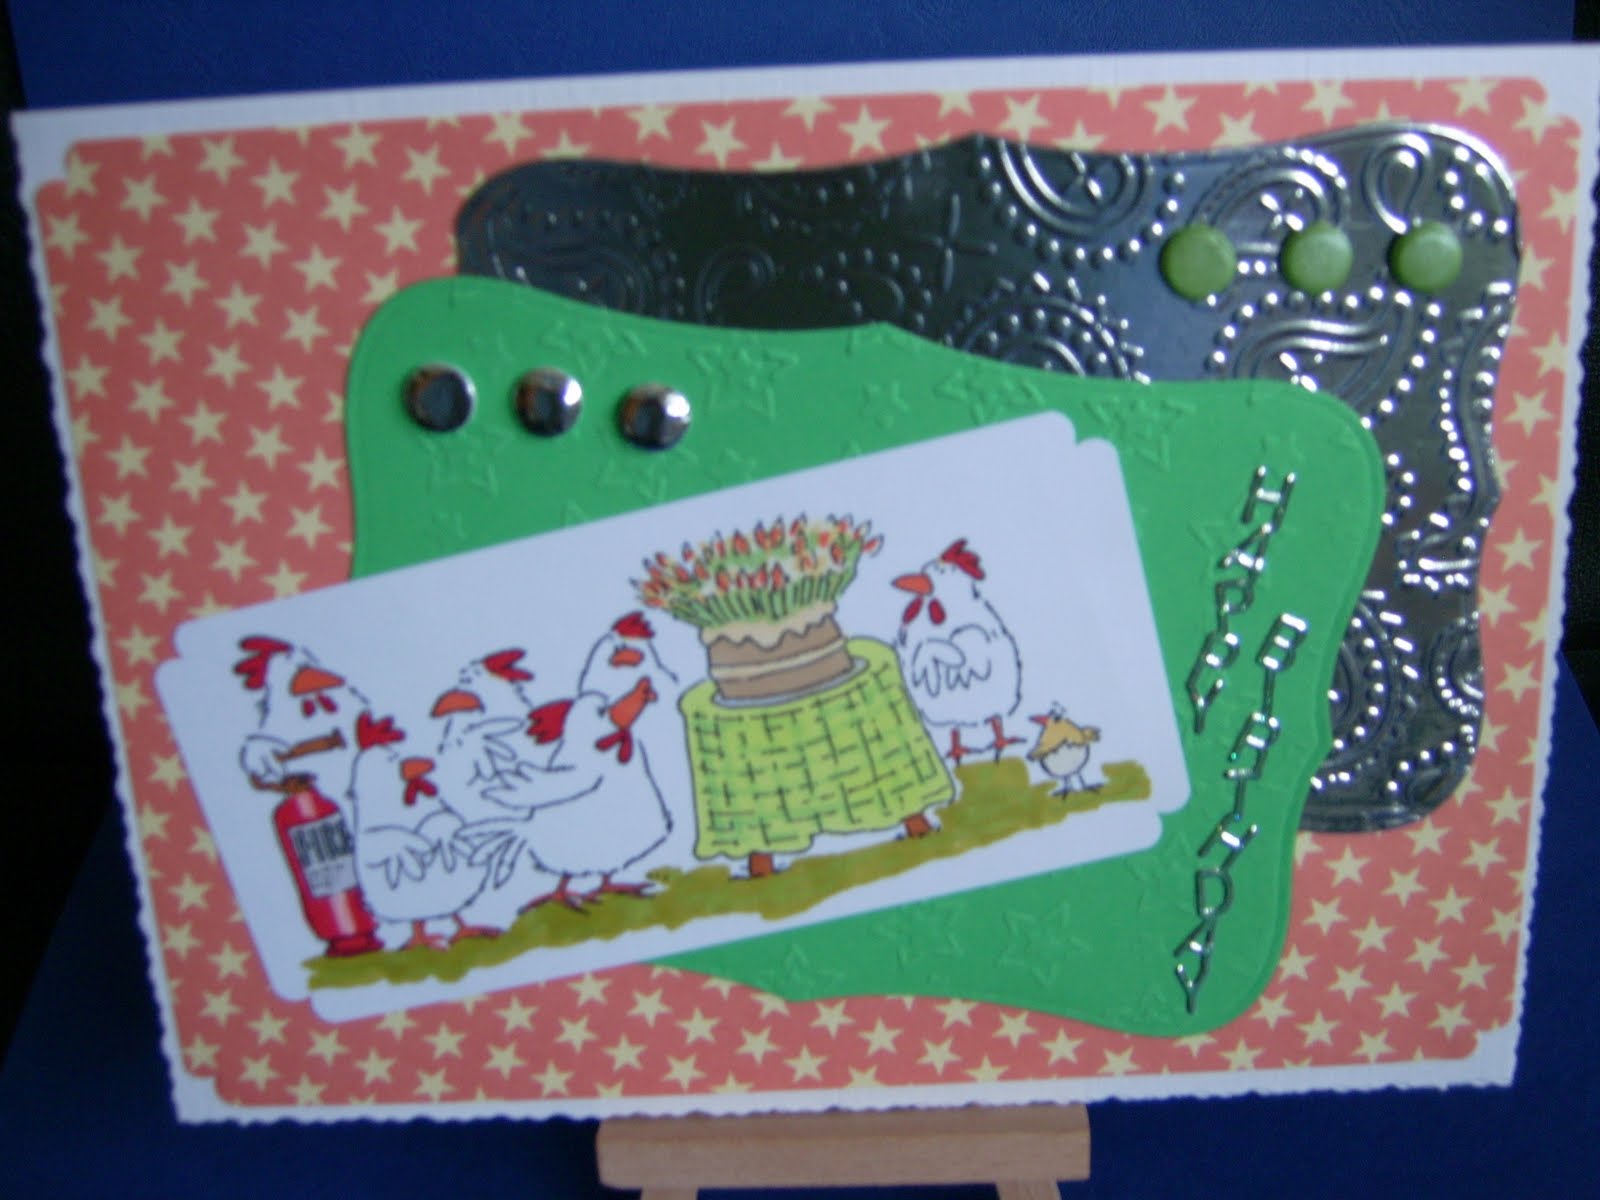
I've not quite finished mine, but here's the main image - a lovely Penny Black one from Di.  It's so pretty and looks brilliant with the glitter - just watch where it goes if you craft on your bed like me - glittery eyebrows is not a good look!

Thursday, 28 July 2011

Penny Black - darling cutie!

I got this little cutie stamp in a set which Di very kindly gave me gift vouchers for making some sock monkeys for her.  I was like a kid in a sweet shop and spent them all at once.  Very naughty, but hey, that's what they're for so I did!!!

I've since had another idea for these, which will be coming soon.  I've used some lovely backing papers and another Nestie (from Di again!) along with some card candy and another of those gorgeous ticket sentiments.

More stickles were added - where would we be without our stickles huh! 

Enjoy!

Tuesday, 26 July 2011

Girlie Birthday

Sorry another photo just near the edge!  Hopefully the pooter will stop deleting them when I rotate them soon so I can go back to my original way of doing things.

Again this one uses my old peel offs - I got these ones in a few different colours so you'll be seeing more of them.  I lost enthusiasm for them, but now with the effect being done with die cuts they look ideal on so many of my charity cards!  Definitely "now" and "on trend" as they say!!! LOL!!
Another LOTV stamped image - I really should keep a note of who sends them to me, sorry peeps - let me know if it's you!  I'll give you credit for them! 

More stickles and a glittering background Nestie (from Di!), I also added Stickles to the sentiment ticket and also the ribbon flower.  Aren't they pretty.  I found them in my stash, a freebie on a magazine many moons ago, and decided to make them all up, so you'll see more of them soon - all different types so hopefully you won't get bored with them....!

Enjoy!

Saturday, 9 April 2011

Some more Promarkering...is that such a word...?!?!?!

I've been colouring like mad lately, I'm hoping to be able to make them into cards soon.  Keeping fingers and everything else crossed!

Hope you like my little girl, she's been coloured with PM's (as if you didn't know LOL!).  Again, quite simple, but colourful.

Enjoy!

Friday, 8 April 2011

Another Getting Older Card...

Here's the second one I made, with restricted stash.  I'm working on getting something sorted so I can craft to my hearts content, but at the moment, everything is going against me.  I won't give up though and will persevere with it!  Like a dog with a bone, says my brother, how kind brothers are huh!

Enjoy!

Thursday, 7 April 2011

Getting Older

I had to make cards for two friends having 'big number' birthdays and here's the first one.  I didn't have much craft stuff out at the time so had to use what was to hand, hence the simplicity of it.  Of course, I had to make it a fun card due to the 'big number'...!

Enjoy!

Tuesday, 29 March 2011

Another girlie card


Some simple corner edging on the backing papers and also the matted and layered cardstock. I then added some embellishments (from Di again!), and a sentiment with some folded ribbon behind one side of it, along with a gem to show it all off.


Enjoy!

Monday, 28 March 2011

Girlie Birthday


I did a little bit of paper piecing on this one, along with some pink gel pens to add in glittery hightlights on the bag and lingerie. It's mainly done with some peel offs I had in the back of the 'craft table top box' so thought I'd use them up. Along with a pretty sentiment (from the wonderful Di as usual!) and some spotty background paper.


The edges of the matted and layered section were rounded with a corner edge scissors I bought. Only some of the edgers work and I did email, then write to Fiskars, but they never replied. Just shows they really care about their equipment and the people that use them.


Some companies are brilliant - and some aren't.


Hope you like the card!

Sunday, 27 March 2011

Another party...!


I said there was another one coming along LOL!
This time it's all in pink! I used a Nestie (from Di I believe) and cut it in half and put it around the opposite edges of the card, with lace on the other two sides (definitely from Di!). I had real problems with this and my hands/fingers but finally got there.
The gorgeous butterfly and circle came from Gill and I used the circle around the sentiment again. I think it looks quite good, it doesn't cover up the whole sentiment, but highlights it. Let me know if my thinking is wrong!
Enjoy!

Saturday, 26 March 2011

It's My Party.....

This lovely image was sent to me by Shirley and I think it's so cute. Kids with attitude!

I used a lovely free stamp I got with the flowers on and added some of those teeny tiny gems I got, and just matted and layered it onto gold mirror card.

I kept it all purple as it seems to suit it. I've done another which I'll show you later in a different colour dress. I think the sentiment says it all really....!

Enjoy!

Tuesday, 8 March 2011

Candles on Fire....


I thought I'd show you one of the images made up into a card this time. Yes I finally got around to making a few!
I used one of the lovely crinkle edged cards Di sent me and used one of my new backing papers (99p bargain!) cut down and used the double scalloped punch for the corners. The Nesties were cut from plain light green card (amazing how good cheap card looks when it's embossed!) and some silver mirror card with a paisley embossing CB folder.
Peel off "Happy Birthday" sentiment and then some co-ordinating Card Candy added in the corners swiftly followed by the image itself. I've got to add some Stickles glitter (recommended by Ambreen - thanks Ambreen!) and then it's done and ready for the recipient.
Enjoy!

Monday, 7 March 2011

Two Little Girls....


Two more Promarker images. More freebies - I just love freebies, it helps increase my charity cardmaking variety and also helps my poor little purse which at the moment has two buttons and a cobweb in there!

BIG THANKS to everyone who has helped me with digis and crafting stash, it is MUCH appreciated and keeps my poor little grey cell from feeling lonely!
Sorry the photos aren't that good. I did put the camera on close up setting, but it's probably me who's a bit shaky and not the camera! Sorry!

Wednesday, 2 March 2011

Little Girl and her kitty....surprise!


Well the image came with a kitty honest!! These images came from a lovely lady called Shirley, she answered my plea for a funny image, and also sent me this one and loads of others too for my cancer charity cardmaking which is nice. I'm trying to get my hair better on the girls....what do you think....?

Friday, 18 February 2011

Mollie Bloom Girl....

I kept this card deliberately simple. KISS should be a motto sometimes, they look lovely!

Another Mollie Bloom stamp for this card, along with some Nesties using pearlised paper type backing, CB'd with a butterfly embossing folder.

Again I used the little circle sentiments, they needed some extra glue on the back as they weren't that sticky anymore, and I put them inside a Prima flower to make them stand out. I thought it was a good idea...what do you think....?

I also used a clear heart with a gold edging to it. Just using up some old peel offs.

Monday, 18 October 2010

Charity Card - Just for Girls....

A very girlie card this time, but not in the usual 'girlie pink' which I think makes a change!


SHOPPING LIST

Here's what you need to make this card:


  • White cardstock as a base

  • Yellow pearlised paper cuttlebugged with an embossing folder

  • Rectangle Nellie Snellen Diecut using yellow cardstock (yahoo I think I've got the hang of this now, certain papers/cardstock it doesn't like but I kinda know which now!)

  • Cream card candy

  • Prima flower again with cream card candy for the centre

  • Red organza type ribbon

  • Sentiment peel off matted and layered using white cardstock and a pink Rectangle Nellie Snellen diecut label

  • Image (freebie) coloured with H20's as usual...!

Hope you like her, she looks quite cute with her striped stockings!

Tuesday, 12 October 2010

Charity Card - New Baby


Girlie and pink - perfect for a new baby girl!


SHOPPING LIST


Here's what you need to make this card:


  • Pink cardstock for base

  • Round the corners using the Corner Punch

  • Pink doodled background printed from Pink Petticoat freebie many moons ago I think - please correct me if I'm wrong - my memory is rubbish after cancer treatment and I readily admit it, it's too bad to hide!

  • Pink Net was a bargain, reduced from £3.99 to 50p - I couldn't resist could I really!

  • Square nestie I was given, my stocks are running low so I don't use them that often!!

  • Cream square which fits perfectly into the nestie

  • Diamond blings added to the four corners

  • "Sweet" sentiment, found in a bargain bin in a closing down craft shop - it was a scrapbooking set but ideal for cardmaking too

  • Gorgeous pink pram donated by Di - she is so generous with sharing her crafty stash and I will forever be in her debt for it! Thanks Di!